-
Step 1 — Pull the spec from the official catalogue, not from memory
-
Step 2 — Match the process to the geometry, not the other way around
-
Step 3 — Ask what "in stock" actually means
-
Step 4 — Separate the 3D printer question from the material question
-
Step 5 — Lock the delivery date, and pay the premium when the date is real
-
Step 6 — Run a first-article check before the full run
-
Step 7 — Write down what went wrong this time
-
A few notes before you file this away
Who this is for: I handle custom machining orders for a mid-size job shop. Twelve years in. I've personally made—and written down—23 significant mistakes, totaling roughly $14,600 in wasted budget. If you're about to send a custom machining order and the delivery date actually matters to someone above you, this checklist is for you.
Seven steps. Run them in order. None of them are complicated, but three of them are the ones people routinely skip, and those three are exactly where the money goes.
Step 1 — Pull the spec from the official catalogue, not from memory
Here's how I got burned the first time: I approved a batch of turning inserts based on what I "remembered" about a coating spec. I said "the same as last time." My supplier heard "the cheaper option from two years ago." Result: 40 inserts that didn't match our holder geometry. $890 straight into the scrap bin, plus a week of re-ordering while the machine sat idle.
Now I open the kennametal catalogue—the current online revision at kennametal.com, not the printed copy in the drawer that predates my employment—and I match part numbers against the drawings before anything gets approved. Part numbers, coating codes, corner radius, tool holder interface. All of it. What I mean is that the memory of a spec and the spec itself are two different things, and the gap between them is where scrap comes from.
Kennametal's catalogue is online, and the current revision is the one to trust—the printed copy on your shelf may be older than the alloy you're cutting. If you're buying carbide inserts or hydraulic tool holders, verify the part number against the current catalogue before you build the rest of the order around it. Takes five minutes. Saves a week.
Step 2 — Match the process to the geometry, not the other way around
Laser tube cutting, waterjet, CNC milling—each one is fairly good at something specific. I used to pick the process based on which vendor returned my calls fastest, which is a terrible selection criterion. That's how we once tried to laser-cut a tube section with a wall thickness the machine could technically handle but the tolerance couldn't hold. The part came back bowed by about 0.3 mm. Not enough to fail a visual, plenty enough to fail the jig it was supposed to slide into.
If you're sourcing laser tube cutting in Lake Elmo or laser tube cutting in Albany, get the shop's wall-thickness range and tolerance spec in writing before you ask for a quote. Two shops in the same metro will quote the same part differently because their machines aren't the same. A fiber laser that holds 0.1 mm is not the same service as one that holds 0.05 mm, even if both descriptions say "laser cutting" on the website.
Real talk: the process you like and the process the part needs are rarely the same thing. Pick the second one.
Step 3 — Ask what "in stock" actually means
I said, "Do you have it in stock?" My supplier heard, "Can you get it?" Result: a three-week lead time I hadn't budgeted for, on an order that needed to ship in ten days.
Now I ask the follow-up question: is it on your shelf, your distributor's shelf, or a truck? Three different answers, three different dates. "In stock" means nothing until you know where the stock actually is and who controls it.
Step 4 — Separate the 3D printer question from the material question
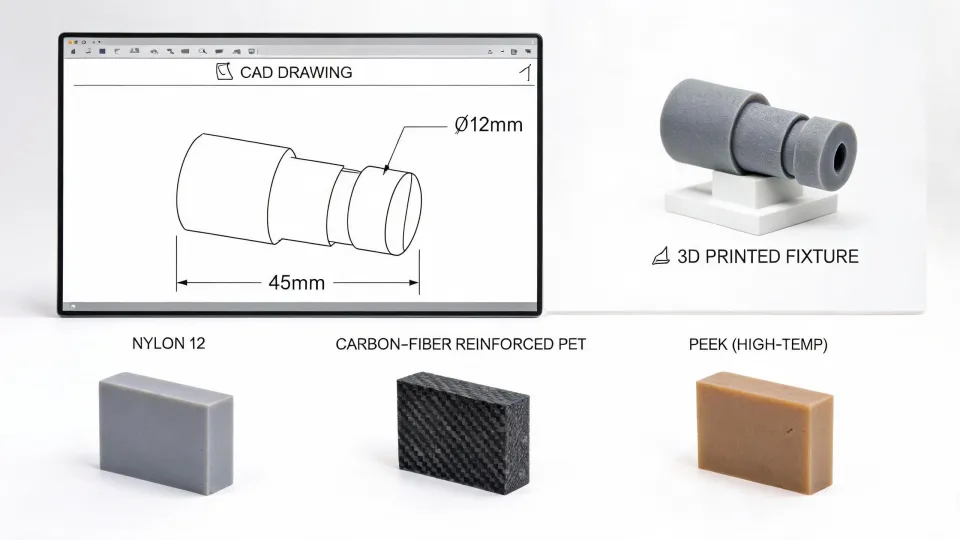
People ask me "what is the best 3d printers" like there's one answer. There isn't. The best 3D printer for a fit-check prototype isn't the same machine as the one for a load-bearing end-use bracket. One prioritizes dimensional accuracy at small scale; the other prioritizes layer adhesion and material properties. Asking the printer question first is like asking which hammer is best before you know whether you're building a deck or a jewelry box.
So before you compare specs, write down two things: what the part needs to do, and what failure looks like. If the prototype only needs to prove hole spacing, almost any calibrated FDM printer will do. If it needs to survive a vibration test, the material is now the primary decision and the printer is secondary. The material—not the machine—is usually what makes a prototype useful or useless.
Step 5 — Lock the delivery date, and pay the premium when the date is real
In March 2024, we paid $400 extra for a rush delivery on a laser-cut tube order. The alternative was missing a $15,000 event install. That $400 was the cheapest insurance we bought all year.
For years, everyone told me rush fees were just vendors padding their margins. I believed that until we missed a $15,000 install because our "probably on time" vendor was two days late. The rush premium looks expensive on the invoice. The missed deadline looks worse on everything else.
Look, I'm not saying rush fees are always the right call—if the deadline is soft, skip the premium and don't manufacture urgency. But if the deadline is real, pay for the date. A rush fee buys you certainty, not just speed. Everyone focuses on the speed part, but the certainty is what you're actually paying for: the vendor scheduling your job into a slot they've already committed resources to. That's the premium. That's what your money is buying.
Step 6 — Run a first-article check before the full run
This is the step most people skip. You get one part back from the shop, it looks right, and you release the full run. Don't.
Measure the first article against the drawing, not against your gut. Over the years, I've caught wrong chamfer angles, off-spec thread depths, and a coating that measured within 0.5 µm of the limit. Small stuff—the kind of small stuff that fails an incoming inspection three weeks later when the full run has already been paid for and shipped.
According to ISO 2768 (general tolerances for linear and angular dimensions), the default tolerance class matters more than most people assume. If your drawing doesn't specify a class, the shop picks one, and you find out which one it picked at the incoming check. Specify the class upfront. Takes thirty seconds on the drawing side. Saves an argument on the receiving side.
Step 7 — Write down what went wrong this time
This is the boring one, and it's the one that compounds. After every order—clean or messy—I write one paragraph: what went wrong, what it cost, what I'll do differently next time. Twelve years of those paragraphs became this checklist.
You're not going to remember the details of this order in eighteen months. Write them down while you're still annoyed about them. Trust me on this one: the annoyance fades. The lesson shouldn't have to.
A few notes before you file this away
Three things I wish someone had told me early:
- Specs confirmed, process matched, date in writing. In that order. Skip the order and the rest doesn't help.
- The cheapest quote isn't the cheapest order. I'm not 100% sure anyone needs to hear this again, but the rework costs are real and they don't show up in the quote comparison spreadsheet.
- "Probably on time" is not a date. If the deadline actually matters, get the date in writing with the premium attached. If it doesn't, stop pretending it does.
None of this is clever. It's the stuff that stopped costing me money after I finally started writing it down. Run the checklist, adjust it for your shop, and update it whenever it fails to catch something. That last part is the only step that never really ends.