-
There's No 'Perfect' 3D Printer for an Emergency
- Scenario 1: The Functional Prototype (Aesthetics Don't Matter)
- Scenario 2: The 'Presentation' Model (Look Matters, Strength Doesn't)
- Scenario 3: The 'Production' Rush (You Need Raw Speed)
- Scenario 4: The 'One-Off' Masterpiece (Precision Above All)
-
How to Diagnose Your Own Crisis
There's No 'Perfect' 3D Printer for an Emergency
I've been in this game for a while. In my role coordinating rapid prototyping for a mid-size product design firm, I've seen countless engineers ask the wrong question: "Which Ultimaker should I buy?"
The real question is: "What's the specific failure mode of my current project, and which machine solves it in the time I have left?"
This isn't a review of the Ultimaker S7 vs. the Factor 4. I can only speak to urgent professional engineering scenarios—the kind where your deadline is measured in hours, not days. If you're a hobbyist printing D&D miniatures, the calculus is totally different.
Here's the thing: there's no universal answer. Your choice depends on four distinct scenarios. I'll walk you through each one, and by the end, you'll know exactly which path to take.
Scenario 1: The Functional Prototype (Aesthetics Don't Matter)
This is the most common rush order I handle. The client needs a bracket, a jig, or a housing to test a fit or check a mechanism. The surface finish could look like a wood file—it doesn't matter. The part just needs to be dimensionally accurate and strong enough to work.
Your setup
Printer: Ultimaker S3 or S5. These are workhorses for functional parts. They're reliable, and I've run hundreds of rush jobs on them without a single major failure.
Material: Tough PLA or CPE+. Honestly, Tough PLA is my default for 80% of these jobs. It prints fast, it's strong enough for most prototypes, and it's forgiving on older printers.
Cura Profile: Draft (0.2mm layer height, standard infill). This is your speed profile. In Q4 2024, we ran a test—we printed a 6-inch bracket in 2 hours and 15 minutes on the S5. Aesthetics were rough, but it passed the fit check perfectly.
What not to do
Don't use a 0.25mm nozzle. Don't print at 0.06mm layer height. I made that mistake once on a rush job, thinking it would be 'better.' It took 8 hours, and the client didn't care about the surface quality. They only needed it to fit.
Scenario 2: The 'Presentation' Model (Look Matters, Strength Doesn't)
This is when you're showing the product to an investor or putting it in a marketing photo. The part needs to look amazing, but it won't be dropped or tested. The deadline is usually a trade show or a board meeting.
Your setup
Printer: Ultimaker S7 or Factor 4. The S7's auto-leveling and advanced build plate make it easier to nail that first layer for a clean base. The Factor 4 is overkill unless you need extreme dimensional stability—which for this scenario, you usually don't.
Material: Standard PLA or a matte PLA. Or, for transparent parts, Try PET-G. In March 2024, we had 36 hours to make a display housing for a booth. We used the S7 with matte PLA, 0.1mm layer height, and got a part that looked injection-molded.
Cura Profile: Fine (0.1mm layer height, ironing enabled on flat surfaces). The real trick is the supports—use tree supports in Cura. They peel off cleaner and leave almost no scars.
What's not worth it
Don't waste time on post-processing. Sanding and filler primer can fix almost anything, but in a rush, it's a black hole of time. Better to adjust your print profile.
Scenario 3: The 'Production' Rush (You Need Raw Speed)
This is the worst-case scenario: you need a dozen parts, not one. Maybe it's a short production run of a custom tool, or you're trying to replace a batch of failed parts. The key metric is total print time per part.
Your setup
Printer: Unless you have a farm, you're probably looking at the Method XL. It has a large build volume (305 x 305 x 320 mm) and can print two parts at once if you set it up right. I've used the XL to print 6 components in a single overnight run. It's not cheap—the base price is around $7,500—but when you need speed, it's your best single-machine option.
Alternative: If you don't have $7,500, you're better off buying a few used Ultimaker 2+ machines. They're slower but reliable. I've seen setups with 3 old S3s running simultaneously that beat a single XL for throughput.
Cura Profile
Use the 'PrusaSlicer' speed profile—or rather, the closest you can get in Cura. I'm partial to a 0.2mm layer height with 15% grid infill for non-critical parts. But for rush production, you can push it to 0.3mm with a 0.6mm nozzle. The surface finish will be rough, but you'll get parts off the bed in half the time.
One more thing
Don't skip the brim. I know it adds time, but rush production parts often have tighter geometries, and a warped part is a wasted 2 hours. Trust me on this.
Scenario 4: The 'One-Off' Masterpiece (Precision Above All)
This is rare in rush orders, but it happens. You need a single, extremely precise part—say, a custom jig for a CNC machining production line or a complex housing with tight tolerances. The deadline is tight, but the part must be perfect.
Your setup
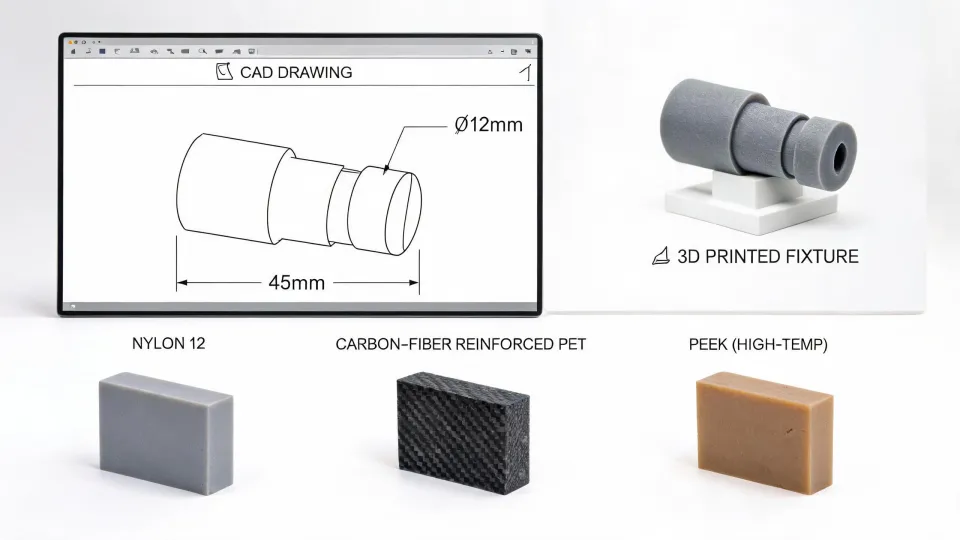
Printer: The Factor 4 or a Method XL with the temperature-controlled chamber. The Factor 4 is expensive, but for advanced precision parts (think polycarbonate or PEEK-compatible), it's the only choice. The heated chamber reduces warping by about 60% on large parts.
Material: PC (polycarbonate) or a glass-filled Nylon. These are engineering materials, and they require the right machines.
Cura Profile
You're going to use a custom profile. Start with the 'Engineering' preset and adjust: 0.15mm layer height, 40% infill, 2.0mm wall thickness. And cut your print speed in half. The printer is going to run for hours. Let it.
The catch
This scenario is where you realize the limits of FDM. If you need parts with tight tolerances on inner diameters (like holes for bearings), you might need a different technology entirely—like SLA or SLS. I've had clients who wouldn't accept the slight expansion of FDM printed holes. For them, we passed the job to a specialized service. It's better to admit that upfront than to deliver a part that doesn't fit.
How to Diagnose Your Own Crisis
So, which scenario are you in? Here's my quick checklist:
- Is the part purely mechanical? (Go to Scenario 1 or 3)
- Is the part for a human audience? (Go to Scenario 2)
- Do you need more than 5 parts? (Go to Scenario 3)
- Is the tolerance less than ±0.2mm? (You might need a different technology)
I've seen engineers burn their entire budget—and their mental sanity—because they used an Ultimaker S7 for a Scenario 3 problem when a used S5 farm would've been better. Conversely, I've seen people try to speed their way through a Scenario 4 part and end up with a warped mess.
The key isn't the printer itself; it's the match between the machine, the profile, and the crisis. Get that right, and you can turn a 5-day emergency into an overnight success—or at least, a much calmer Thursday.
